Installation can be performed using the standard WordPress.org plugin installation and activation process or by uploading the .ZIP file obtained from this website to the ‘Plugins’ > ‘Add Plugin’ > ‘Upload Plugin’ menu in WordPress Admin.
Pre-Requisites
- OpenAI API Key: instructions to get one here.
- AWS Cognito Pool Identity Key (for Avatar voices): instructions to get one here.
Quick Video Guide
Getting an Amazon AWS Cognito Identity Pool ID
- Visit https://aws.amazon.com/ and create a Free Tier account or login if you already have one. Note the Free Tier still requires a Credit Card. We recommend setting up MFA also for added login security.
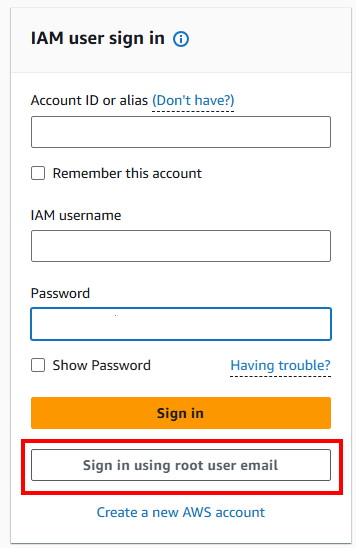
- Login using your ‘root’ account/email.
- After login, you will be taken to a screen as follows.
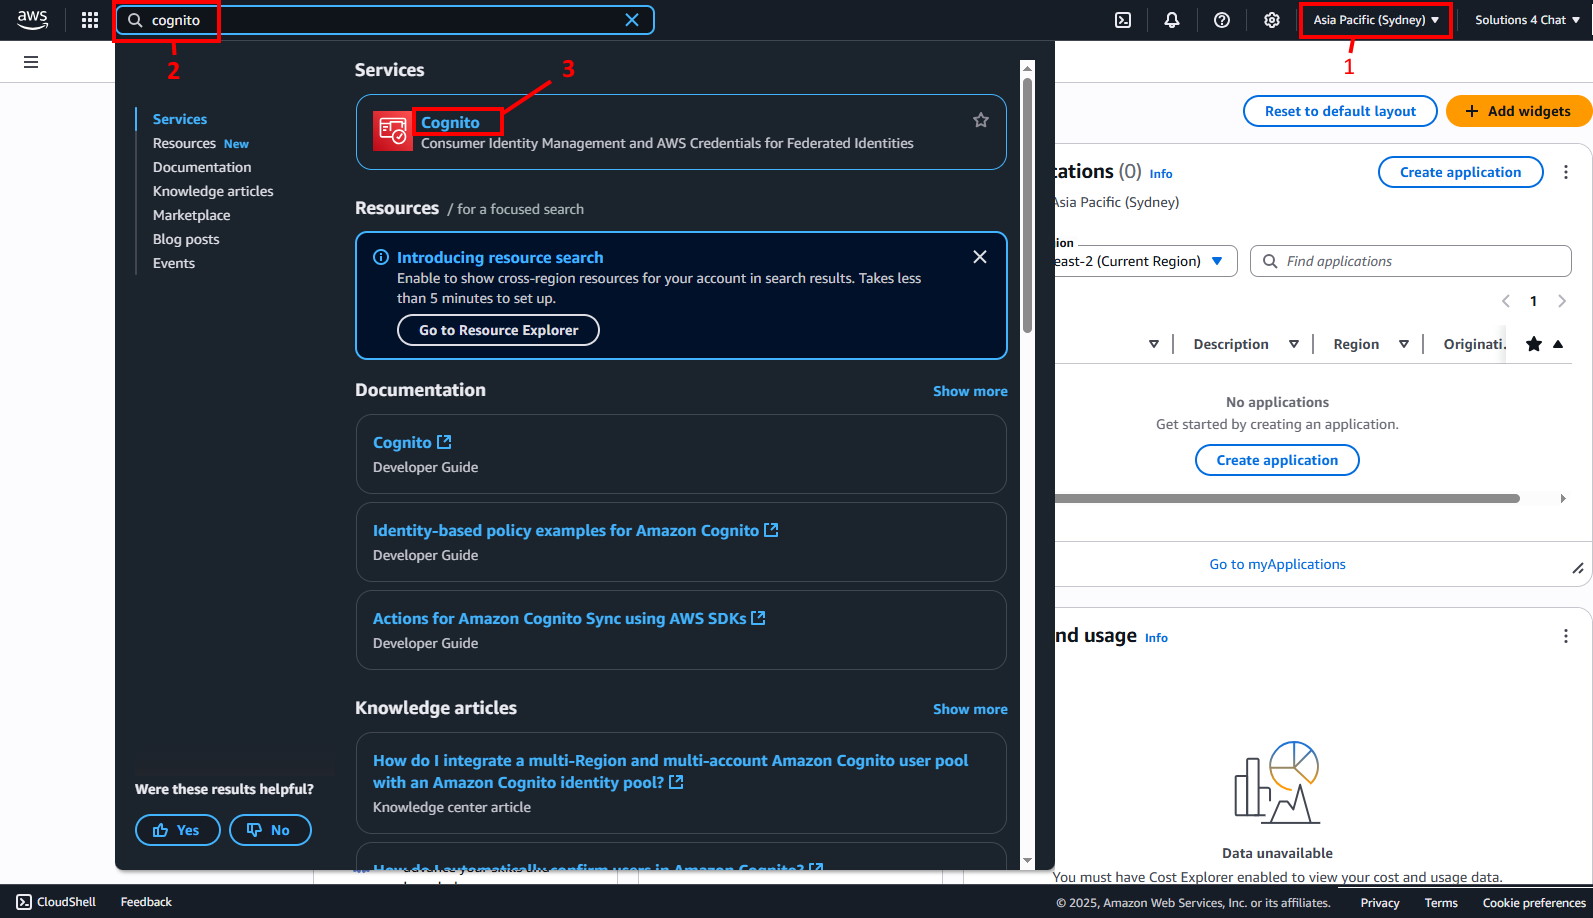
Ensure you are in the in the correct Region (1)
NOTE: You must select a valid region that supports Polly Neural voices.
Next enter ‘Cognito’ in the search bar (2), then select ‘Cognito’ from the Services (3) - You will see a screen like this
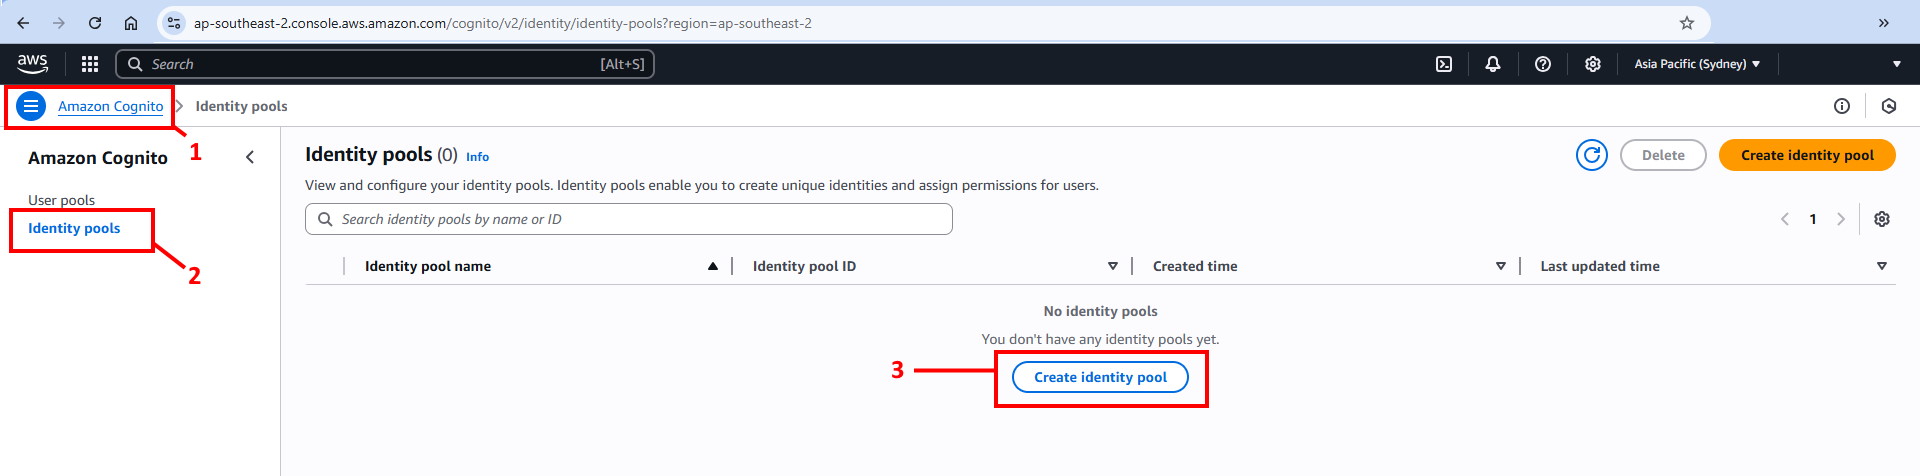
Click the top left menu (1) then select ‘Identity Pools’ (2), then ‘Create Identity Pool’ (3). - In the next screen

Click ‘Guest Access’ (1) and then ‘Next’ (2) - In the next screen
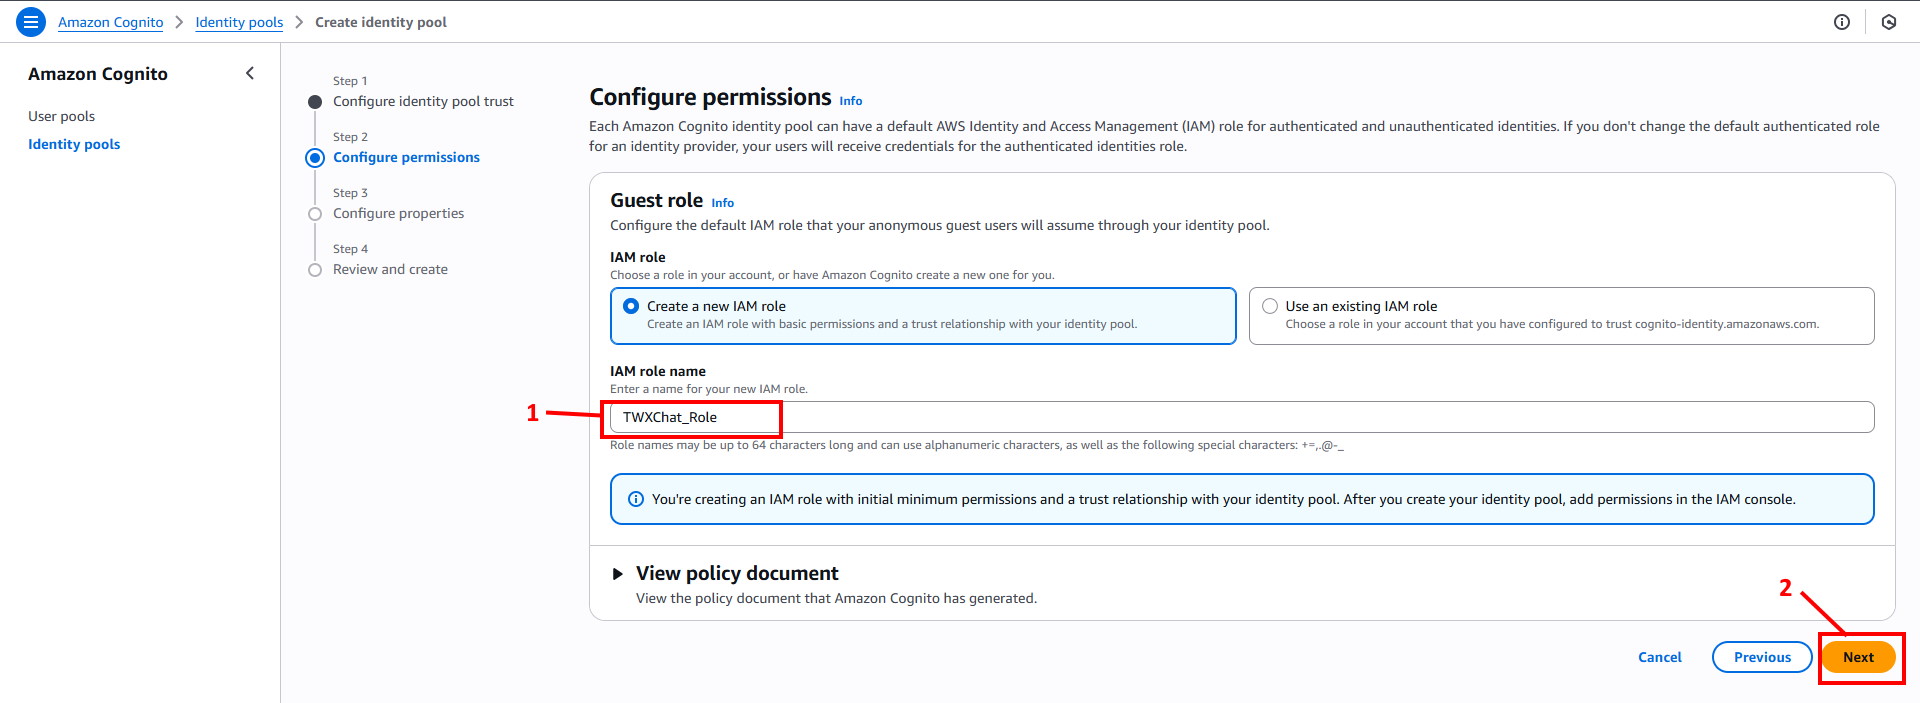
Enter IAM Role Name ‘TWXChat_Role’ (1) and then ‘Next’ (2). - In the next screen
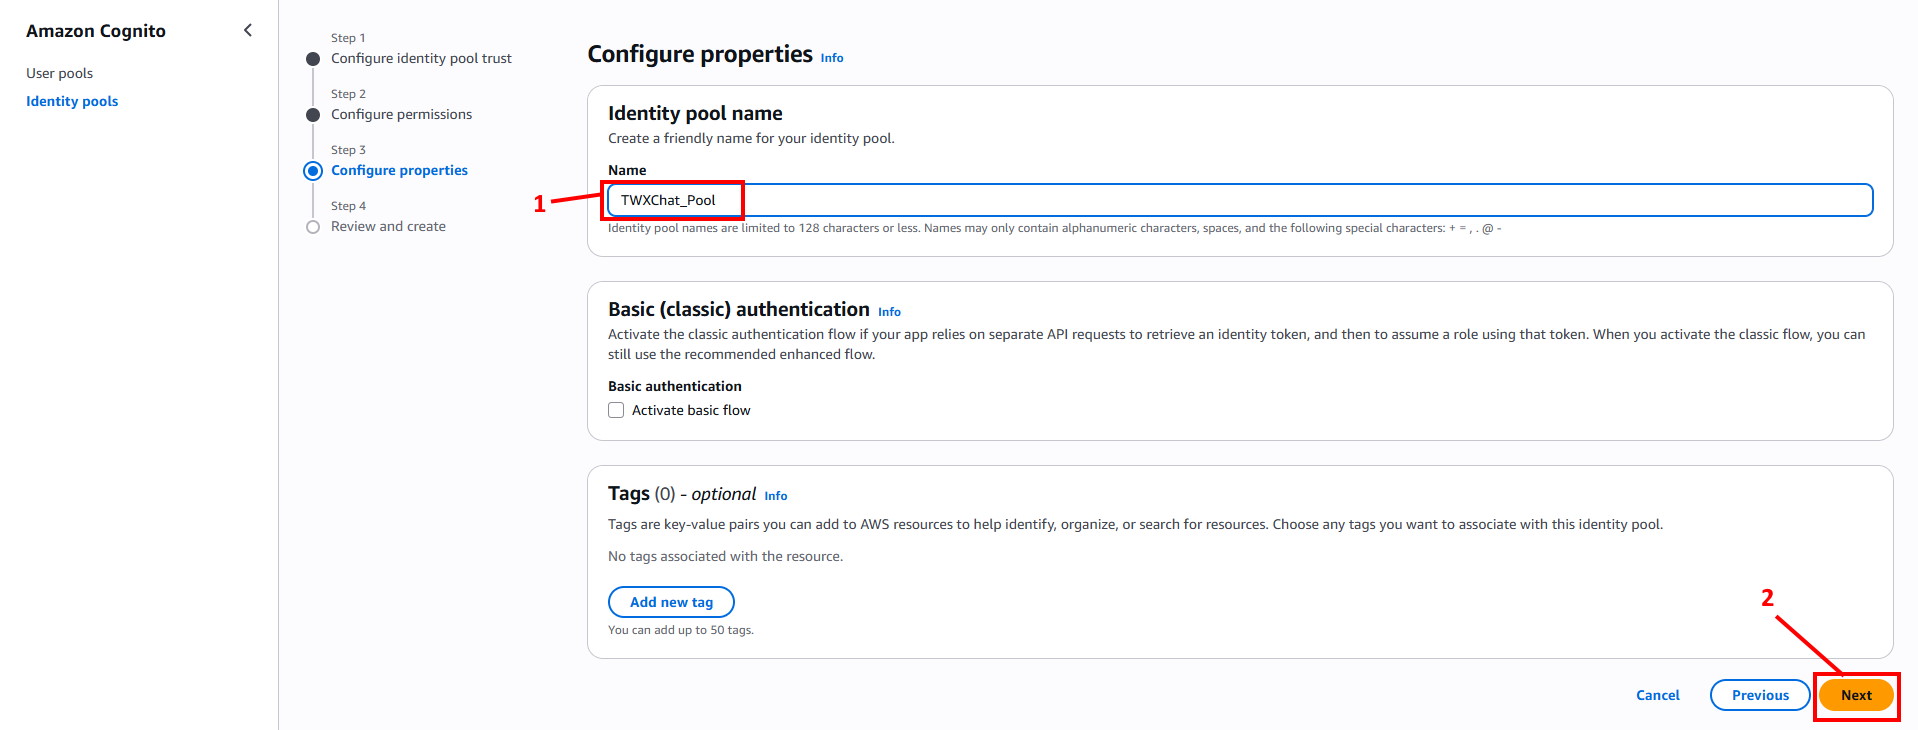
Enter the Identity pool name ‘TWXChat_Pool’ (1) and click ‘Next’ (2). - In the next screen

Click ‘Create Identity Pool’ (1). - In the next screen
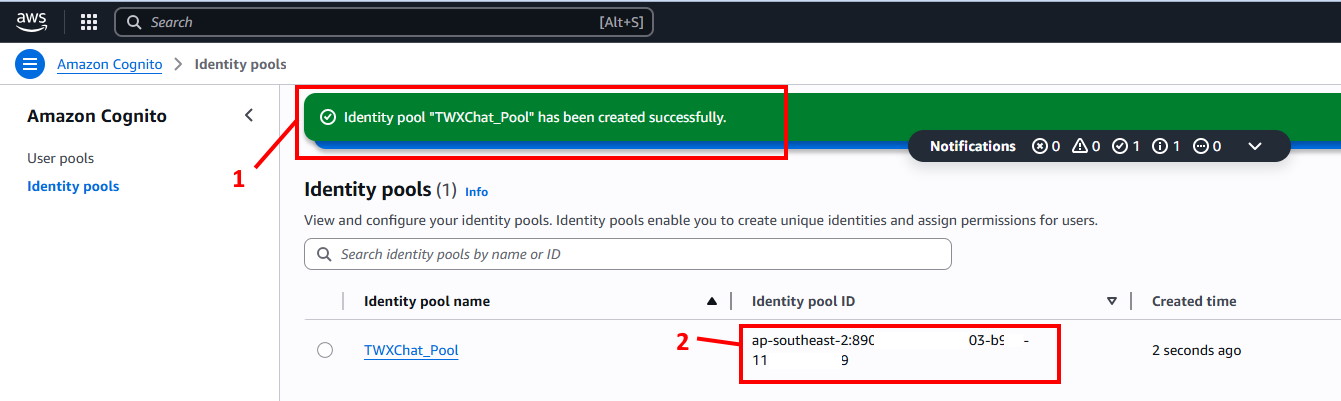
You will see that the Identity Pool has been created (1) and also the ‘Identity Pool ID’ (2) that you will use in the Plugin. Copy/Paste this into Word or Notepad for later use but keep it safe! - In the Search bar…
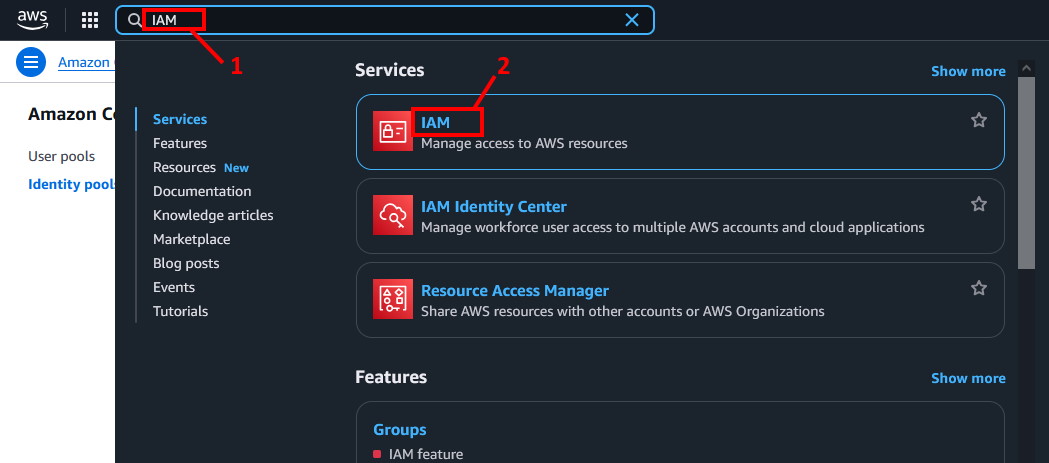
Enter ‘IAM’ (1) and select it from the Services (2). - In the next screen
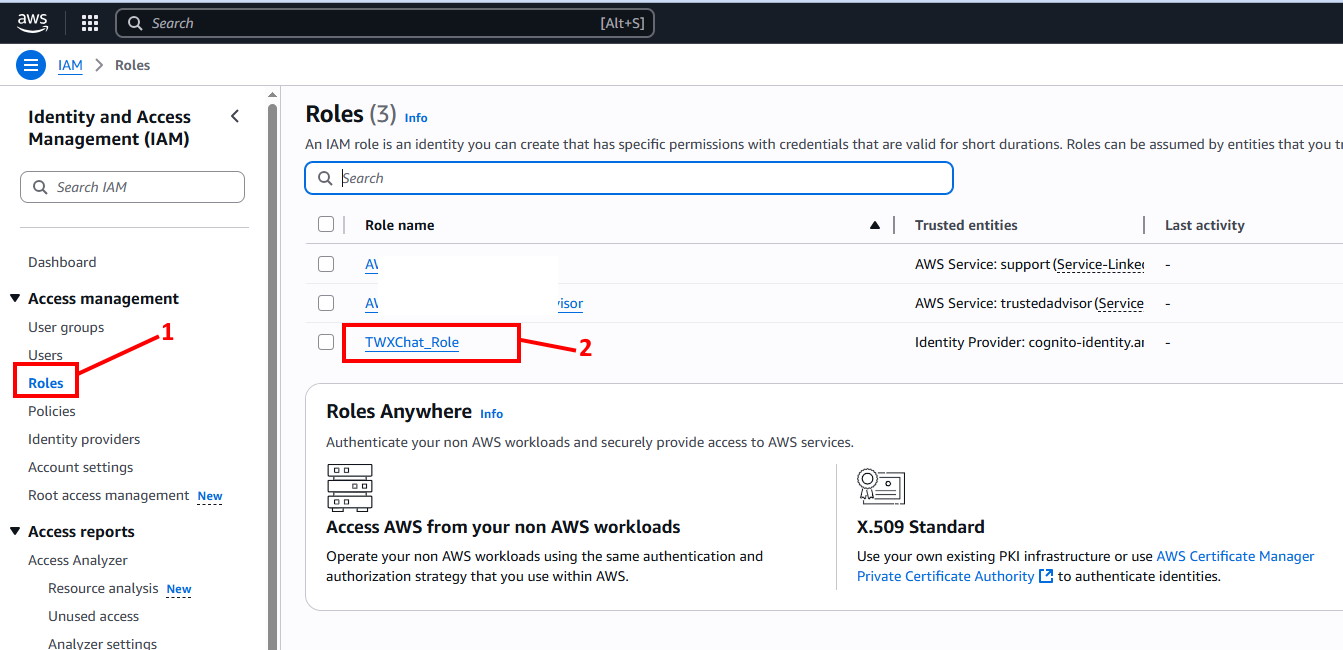
Select ‘Roles’ from the left menu (1) and click ‘TWXChat_Role’ (2). - In the next screen
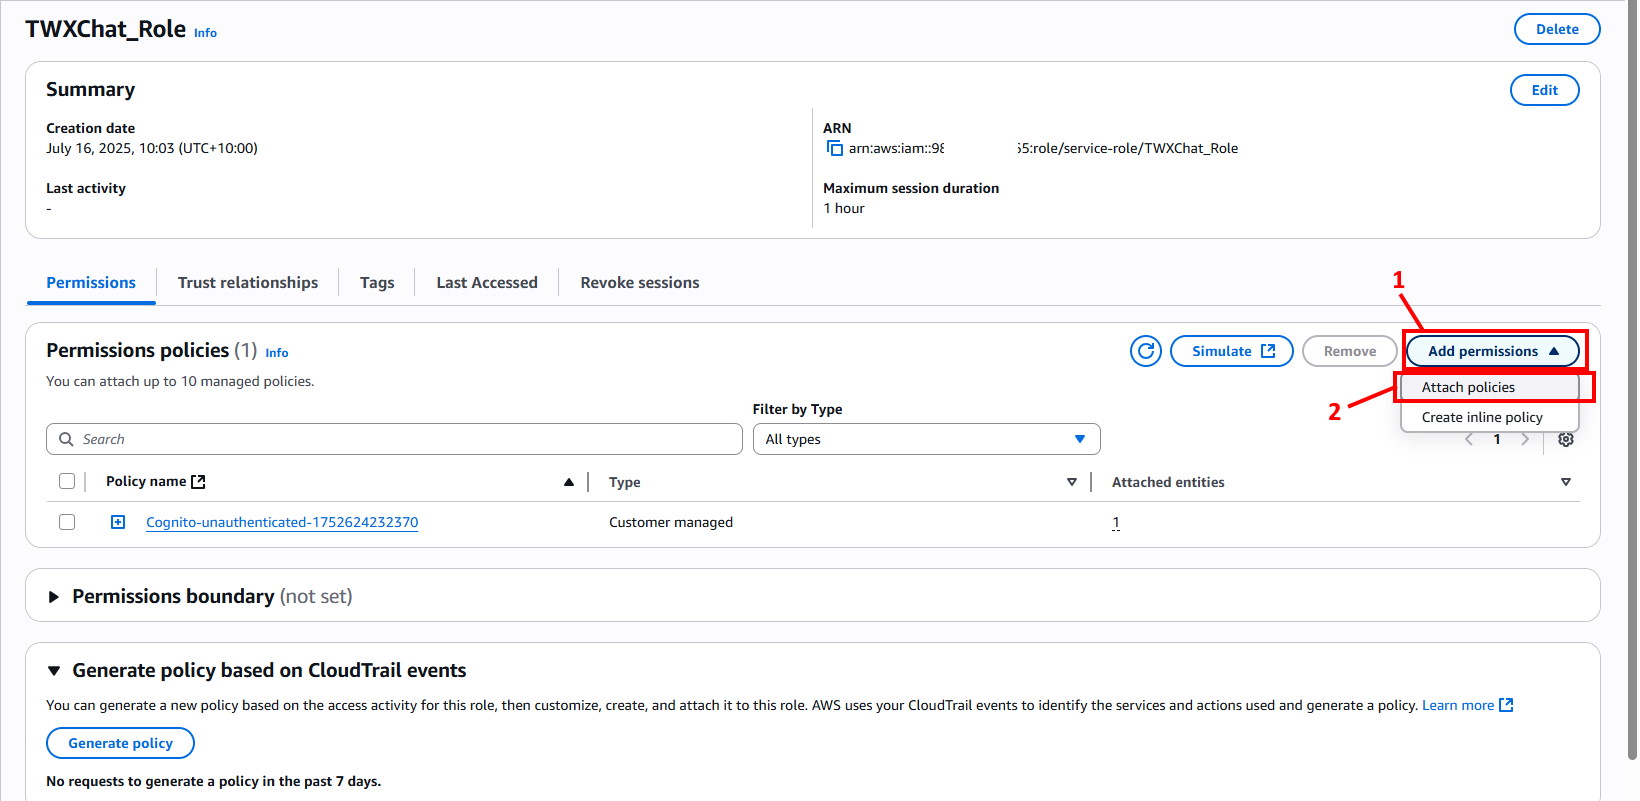
Select ‘Add Permissions’ on the right (1), then select ‘Attach Policies’ (2). - In the next screen
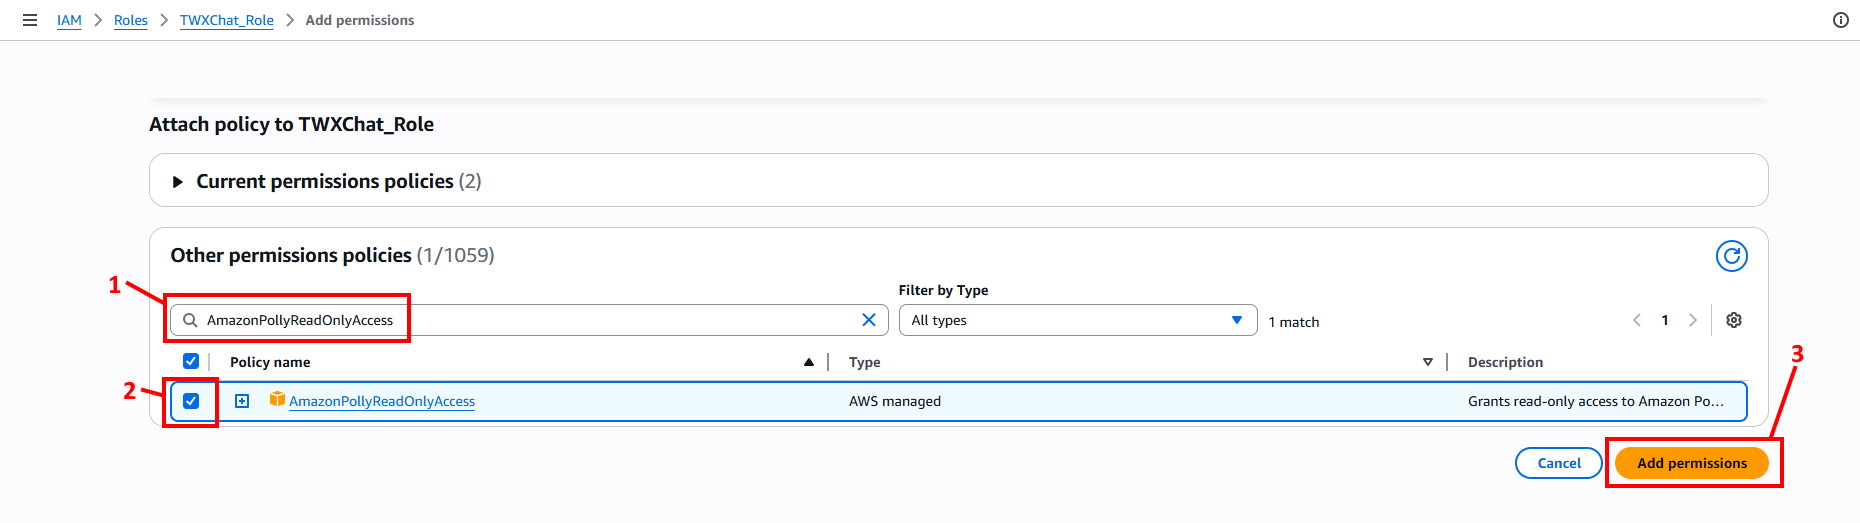
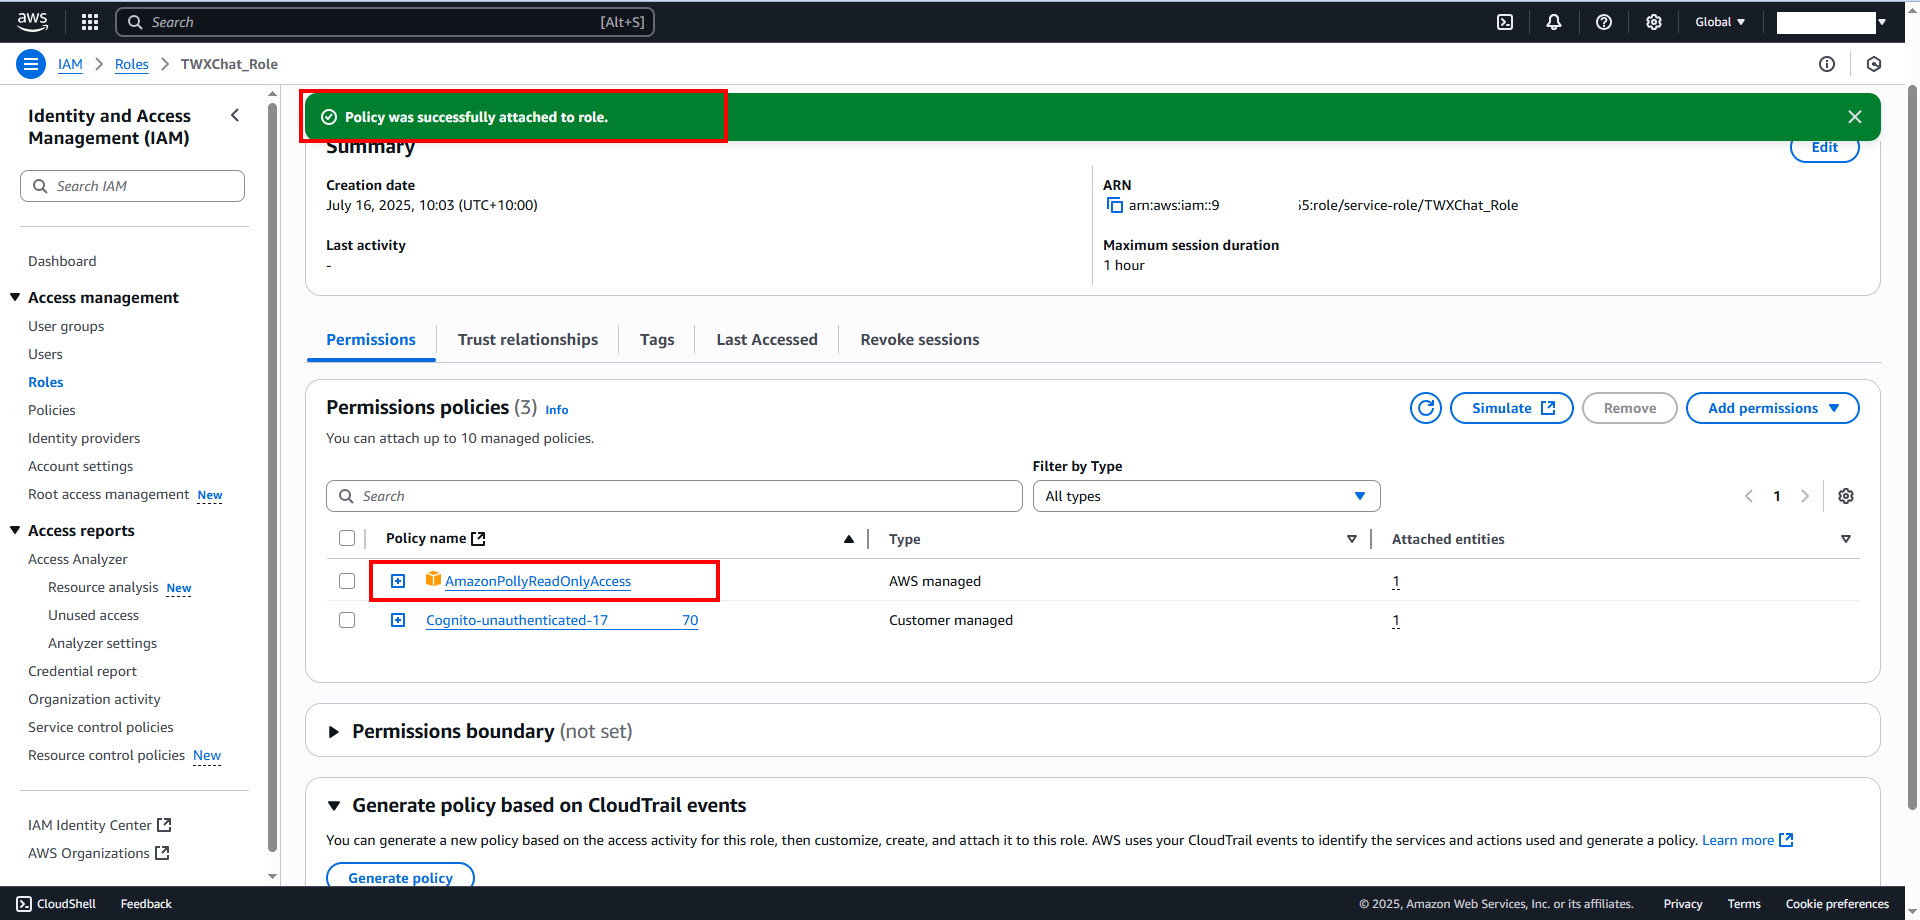
Enter ‘AmazonPollyReadOnlyAccess’ in the search area (1), then select the checkbox next to ‘AmazonPollyReadOnlyAccess’ in the results (2), then click ‘Add Permission’ (3). - In the next screen you will see the Policy has been added
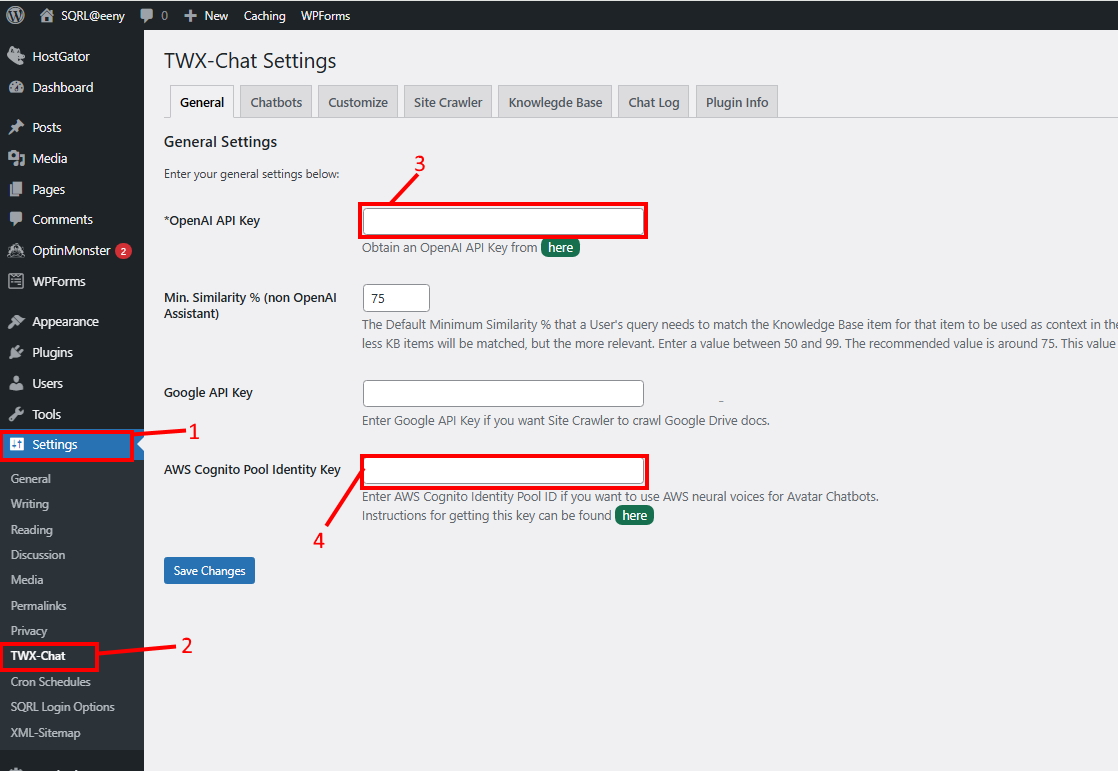
- THAT’S IT!! Now just paste the AWS ‘Cognito Pool Identity Key’ from Step 9 into the Plugin field (4) and click ‘Save Changes’.
NOTE: You can also visit Amazon’s own instruction page for this but it doesn’t have pretty screen shots 🙂